20 Application Packaging Life Hacks
On Friday 29th of March, 2019 Master Packager team was one of the panelists in xenappblog.com event called Virtual Expo. As promised, in this article we will show 20 tips and tricks that we showed in the virtual expo session. Most of the tips and tricks are done using FREE version of Master Packager. Download for FREE.
1. Enable MSI Logging
When MSI logging applied to all your test machines it will force to always create MSI log file in the %TEMP% folder.
- To see if EXE installer launched an MSI installation
- To check for errors
- To check properties modified during MSI installation
- To skip adding /l*v switch to all MSI installations
Apply the following registry key to enable MSI logging:
Windows Registry Editor Version 5.00
[HKEY_LOCAL_MACHINE\SOFTWARE\Policies\Microsoft\Windows\Installer]
"Logging"="voicewarmupx"
2. Response Transform
Response Transform makes finding selected settings during MSI dialog steps very easy. This feature is available in the FREE edition, yes. I know that you cannot believe it, but it is for free.
- Open Master Packager Click “Response Transform"
- Choose MSI
- MSI installation will come up
- Select settings you need and click install
- Nothing will be installed, but MST file will be created with only changes made from the dialogs.

Note! Response Transform feature works only for MSIs with dialog tables.
3. Fast way to find settings in the MSI
If you need to find something very specific configuration in the MSI like how to disable updates from MSI tables, then filter option comes in very handy. Usually, update properties can be found in the registry table and property table. Table filter is super-fast, even in tables with more than 100 000 rows.
4. Apply company/application standards with one click
Usually, packagers must use some company standards or other things that are applied often to MSI packages, for example, properties like COMPANYNAME=Your Company Name, LIMITUI=1, or even company fingerprint that could be registry keys, so it is possible to detect from where this package comes from.
Master Packager template feature allows automating Property, Registry, Custom Action and Summary Information applying on MSI or MST as well as support PowerShell scripts that can set the value of the template is applied.
5. Automate using advanced templates
Templates feature in Master Packager can be used to help automate more complex tasks that you may need to achieve working as an application packager.
One example of templates we provided together with the Master Packager is CMD to VBS template that converts standard command line to VBS format command line and automatically adds it to the CA table to run during installation.
As application packagers ourselves, this was one of the tasks, we really wanted to be automated. The best part is that Master Packager supports user created templates as well, so you can build even better templates that automate your tasks.
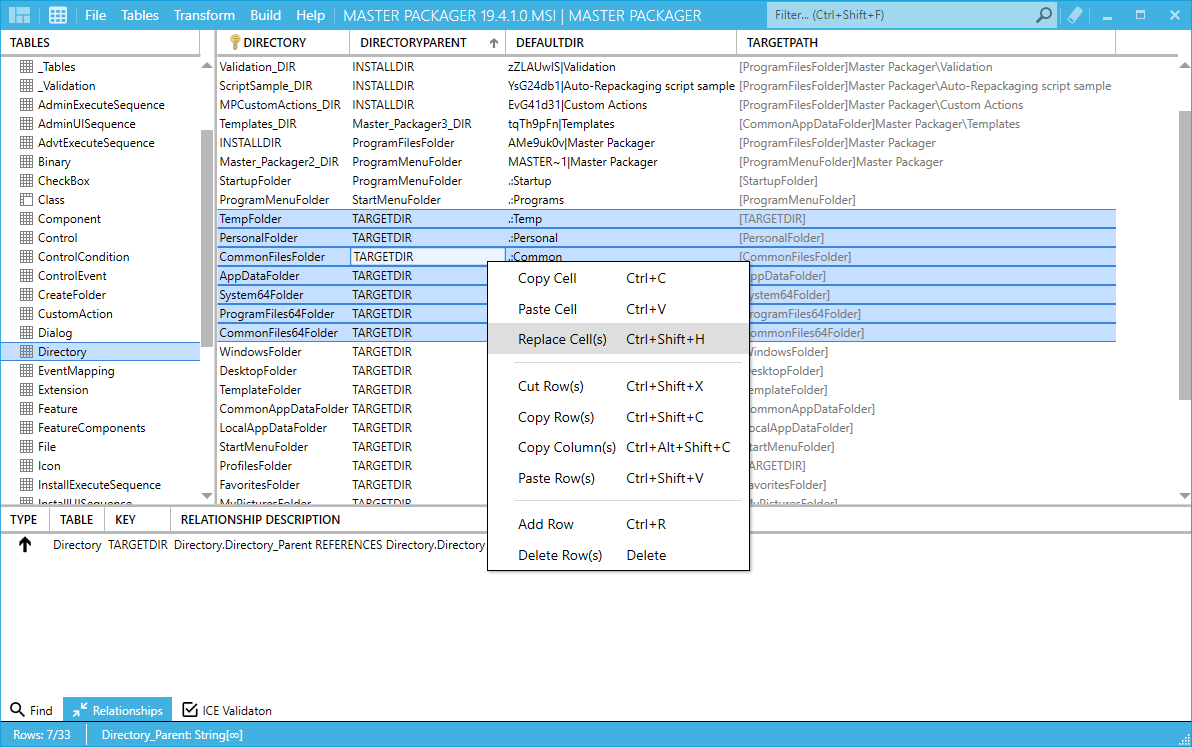
6. Replace cells
There is a case where application packagers were forced to use excel to change specific cells in a column however, that wasn’t very time efficient task as well. Therefore, we created a feature called Replace Cells. This is useful when Find and Replace cannot be used. Now packager can:
- Mark required rows where the target cell that needs to be changed are located,
- Right click and click Replace Cells or press Ctrl + Shift + H
- Choose a column where cells need to be replaced
- Type new text
- Press replace
7. How to extract icon from MSI
- Open Master Packager
- Go to the table editor
- Select the Icon table
- Click on data cell to extract icon you want
- Click “S” (Save) button and choose where you want to save it
Easter egg hidden feature: In Icon table click on the row data cell you want to export icon and then press Ctrl + C and then Ctrl + V on the desktop. Done - icon is exported.
8. AppSearch and Conditions in MSI to avoid creating custom .bat files
This lifehack is here to show how simple and powerful at the time MSI technology can be that can easily do things a lot of admins do with fuzzy batch scripts.
Scenario: I need to install a new configuration file for the application. For HR department MSI needs to install configuration with HR-specific settings and for IT department with IT-specific settings. We assume that target machines for HR have registry key installed with name “HR", but for IT registry key with name “IT" (usually there is something by what to detect each department). In this case, we need to add both configuration files each in separate components and set condition, like DEPARTMENT=”IT"/DEPARTMENT=”HR". Then go to AppSearch for registries and add AppSearch searching for registry key and name that sets department name.
Now we have MSI that is safe to install, control and most importantly can be uninstalled, unlike simple .bat or .vbs script.
9. AppSearch Property cache
Did you know that public properties can be changed via command line before installing the MSI?
However, if the end-user does a repair of the MSI, the property that was set via command line during the installation will be ignored and the original value from the MSI will be used instead. That can lead to not working software.
There is a solution using the registry and AppSearch tables. You do not need more details on how to set it up manually if you are using Master Packager:
- Right click on Public Property in the Property table
- Click Add Property to AppSearch
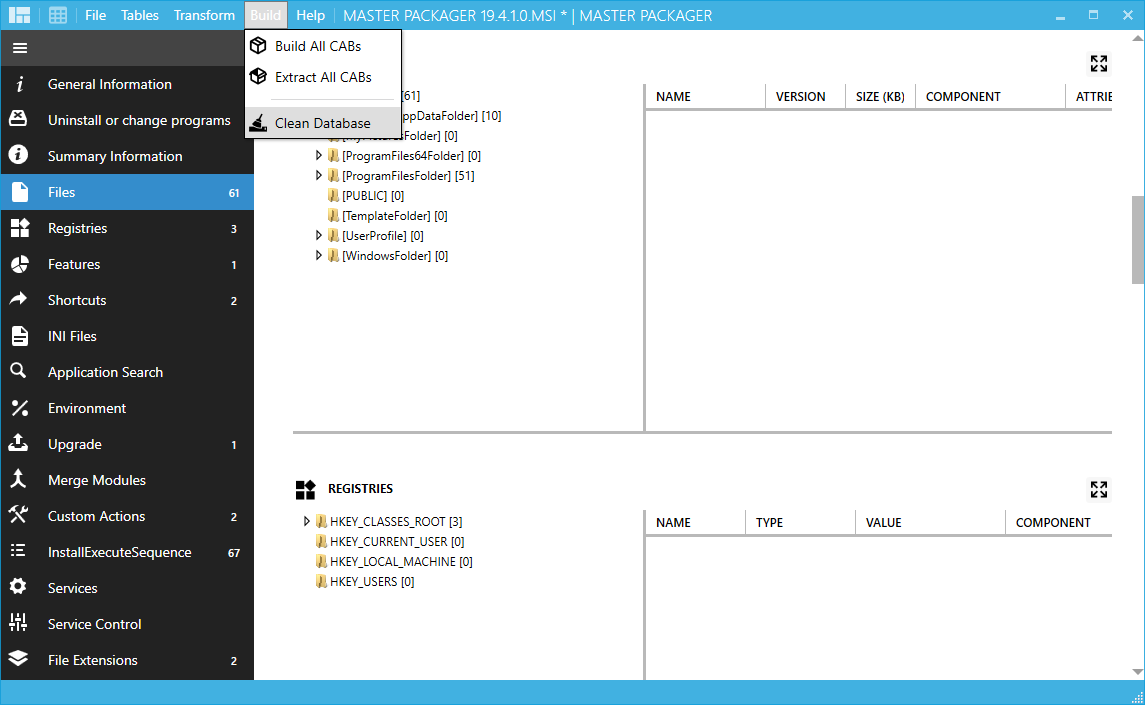
10. Clean Database - reduce MSI size
You have MSI file with a large file inside the MSI and your task is to replace this file with a smaller size file. However, after deleting this large file and build new smaller file MSI file size is not reduced but the opposite - increased. This is due to the fact after deleting a built-in file and deleting it stream binaries are not deleted. Using a simple editor tool, it is not possible to reduce it either. Therefore, we added Clean Database feature, that cleans unused streams from MSI in that way reducing MSI size.
- Open MSI
- In top Menu select Build
- Clean Database
11. Find errors in MSI log file faster
When searching for an error in MSI log file open it with any text editor and search for text “error ". The key here is to search text "error " with empty space after the text that will reduce search results where text error doesn’t indicate the real error.
12. Always test with the system account
Deployment systems like SCCM use system account to install applications on target machines. Out there is all kind of weird vendor MSIs containing different Custom Actions and MSI table configurations that may not always work under system context. Therefore, it is recommended to always test all your applications (not only MSIs) under system account using PsExec before moving it to production.
Here is a command line that enables installation under system account:
“Path to psexec.exe" /si msiexec /i “path to MSI” /qb
Download PsExec:
https://docs.microsoft.com/en-us/sysinternals/downloads/psexec
13. Active Setup alternative. Is it better?
Very often to add application configuration, disable automatic updates or application first run popups we need to set configuration in per-user location. Active Setup always has been golden standard to apply in MSI that would trigger MSI repair to install per-user files. Active Setup is not a perfect solution as per-user files and registries will only be applied after user re-logs to Windows as well if the MSI is large, the login process can take some time.
Master Packager team designed a feature where you can choose a file, folder, or HKCU .reg file that will be applied to all users during the system context installation. Per-user data will be added to the default user as well, so new users always get the configuration. Same can be done on uninstallation.
To enable it open MSI with Master Packager, go to Custom Actions in Advanced Editor view and press pencil editing icon to open Custom Action details. Then choose Predefined Actions tab and click “Add New Predefined Action".
14. Environment variables
MSI mechanism can handle environment variables very well however there are cases where if MSI table is incorrectly filled it can result with duplicate environment variable values.
The correct way should be that environment variable value should be added as a separate envirnoment table entry. That will ensure MSI will not create duplicate values if the environment variable already contains the same value. Master Repackager has this logic and will handle each environment variable separately.
15. How to clean-up repackaged MSI
- Whenever possible repackage applications on Windows 7 virtual machines. Windows 7 has a lot less background noise than Windows 10. That makes repackaged MSI cleaner.
- Before capturing make sure Virtual Machine does not have other applications installed.
- Always make sure all prerequisites like Visual Studio C++ are installed before you install the main application and start packaging process.
- Know what you have captured:
- Compare the captured items from the virtual machine with items on your physical machine. If the items match, then probably it needs to be excluded.
- If you have doubts about captured items – google it, to be sure it is not system or common data.
16. Use Process Monitor to find where configuration is stored
Use process monitor to find where application configuration is stored.
https://docs.microsoft.com/en-us/sysinternals/downloads/procmon
Because Process Monitor sees everything little change on the system it is required to filter it to show only necessary changes. To do that:
- Open Process Monitor
- Filter > Filter…
- First dropdown: Category
- Second dropdown: is
- Third dropdown: Write
- Press Ok
- Find your application process name you want to see made changes > Right Click > Include ‘Process Name’
17. Never launch application during repackaging
During the repackaging process always avoid launching the application or allowing that captured application launche other applications like Internet Explorer for example.
The reason for that is simple – less captured trash in the package is easier to clean up. If it is not possible to suppress another application from launching during the capture then just launch it before the packaging process.
- But how do I capture specific settings I need to configure in the application if I am not launching the application?
- Use process monitor to see where the settings are stored and include in your package only the necessary configuration changes.
18. Fully automated repackaging process from A > Z. [Download] an example
With Master Packager Professional edition command line support, it is possible to create “recipes" by anyone on their own and that allow a simple script to get the latest version of the application downloaded from vendor site, installed, configured and repackaged to the ready MSI.
How to test and adjust auto-repackaging 7-zip script:
- Download Auto-repackaging 7-zip script
- Replace Master Packager MSI with the latest version downloaded from the Master Packager site
- Open Repackage.vbs and change your-registred@email.com and licensekey to your trial or purchased Master Packager Professional license information
- Optional: to adjust exclusion xml files inside the Exclusions folder to automatically exclude not needed files and registries
- Optional: to adjust template inside the Templates folder to apply configuration
- Run Repackage.vbs
- After repackaging process find ready MSI file in “C:\MRP\Repack” folder
19. Use PSAppDeployToolkit
Situations when Master Packager team recommends to using in the most:
- Installing dependencies with the package
- Installing multiple packages
- When deploying packages during business hours
- End-User interaction and simple interface
- Process closing for previous software version
- Checking the battery life of the laptop to postpone the installation
- Checking if end-user is in presentation mode to postpone the installation
- Adding fingerprint for packages
- Uninstalling previous application versions that cannot be uninstalled using MSI Upgrade table
https://psappdeploytoolkit.com/
20. FREE tool - everything you need when working with MSI files
Master Packager is an application packaging tool to create and edit Microsoft Windows Installer (MSI) files and repackage other installations to MSI format.
Our vision is to make application packaging easy, fast and affordable so that is accessible to everyone from application packaging freelancers, small companies to large enterprises.
Master Packager Standard is FREE and it is all you need when working with MSI files.
Master Packager Professional makes possible to repackage even the most complex applications to the MSI format and fully automate repackaging process.