MSI Shortcuts
Here are the top two questions we get and our answers regarding MSI shortcuts:
-
How can I create a shortcut using MSI that points to a UNC network path?
-
How can I create a URL shortcut to a website?
1. Create UNC network path shortcuts
In an enterprise environment, it’s common for some executables to be stored on a network share, which users must access from their computers.
We’ve created hundreds of packages like these, and this is how we like to do it.
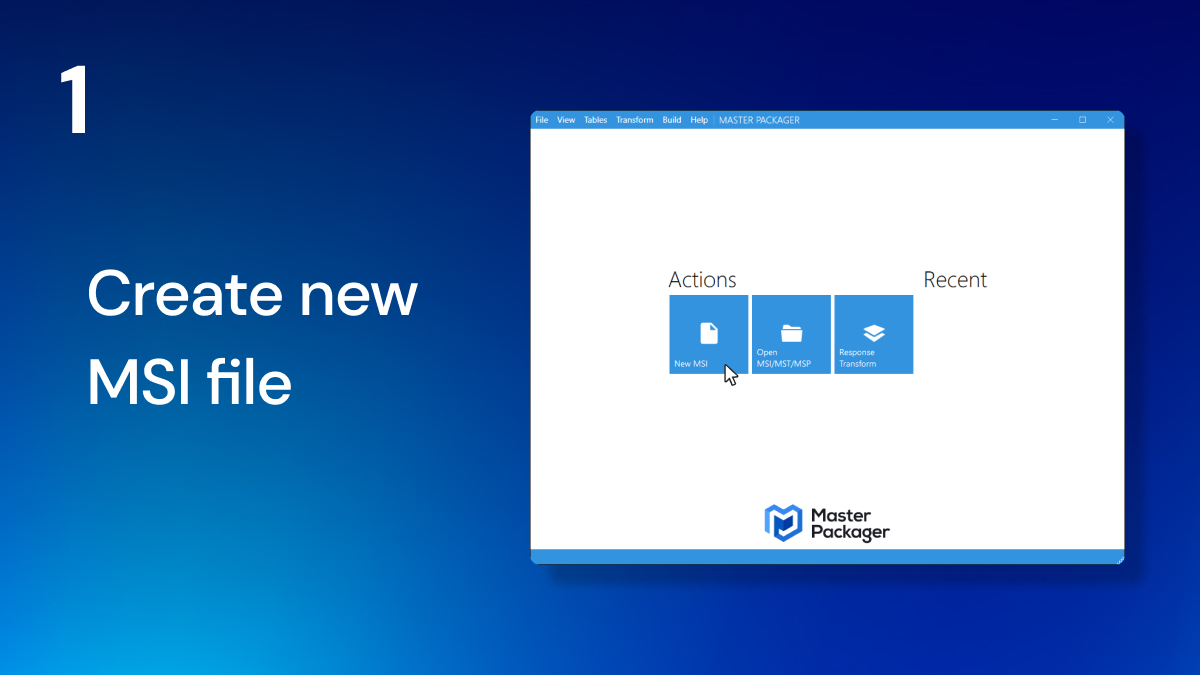
1. Create a new MSI file.
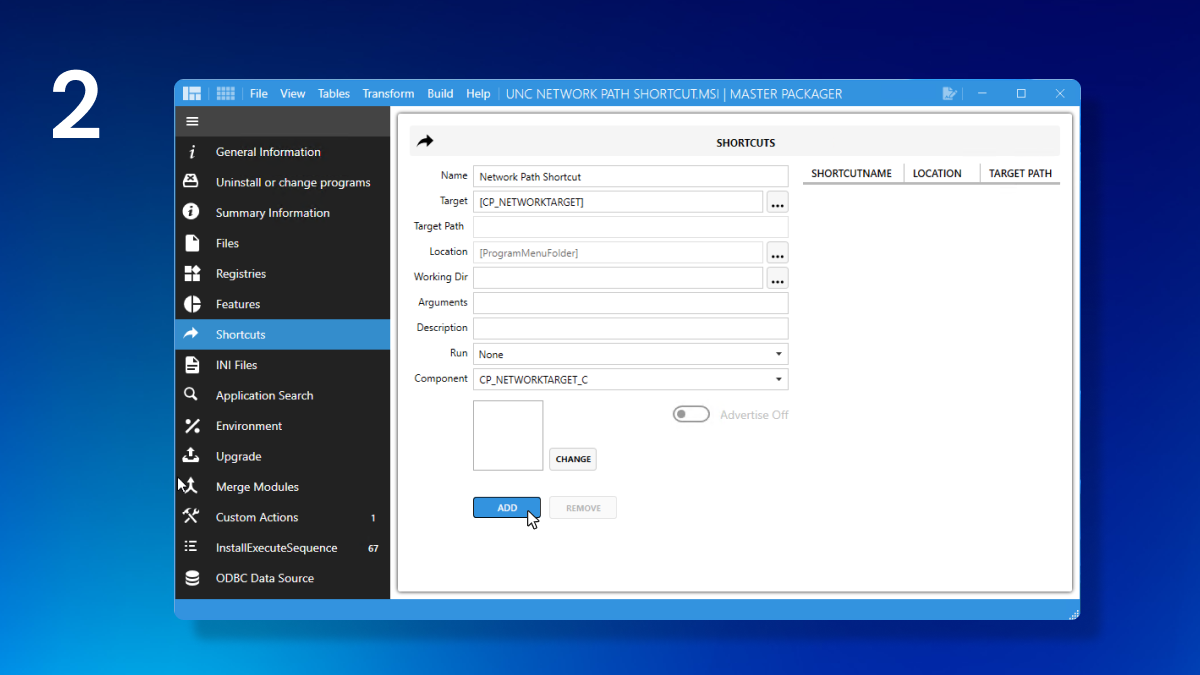
2. Create a shortcut and set its target as a property enclosed in square brackets.
Remember - Custom Public Properties must be written in all capital letters like this: [CP_NETWORKTARGET].
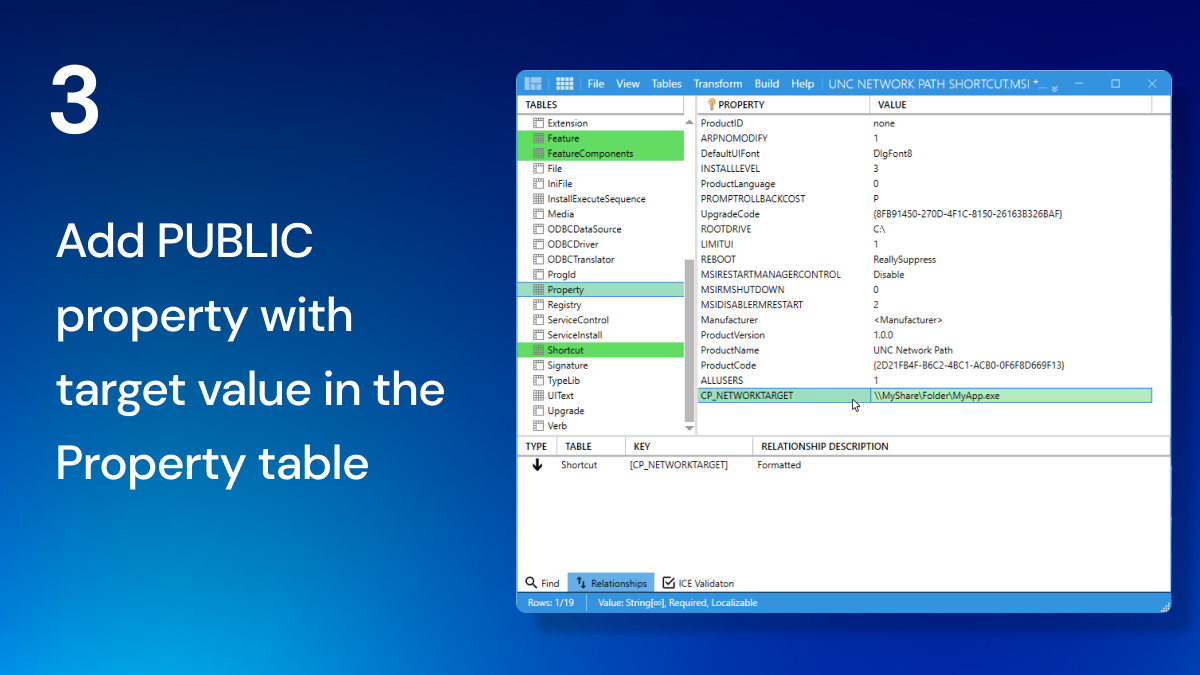
3. Add a new property with the same CP_NETWORKTARGET name.
You can do that from Properties view in the Advanced Editor section or from Table Editor.
Set the target value for this shortcut.
💡 You can switch between Advanced Editor and Table Editor with two icons in the top left corner.
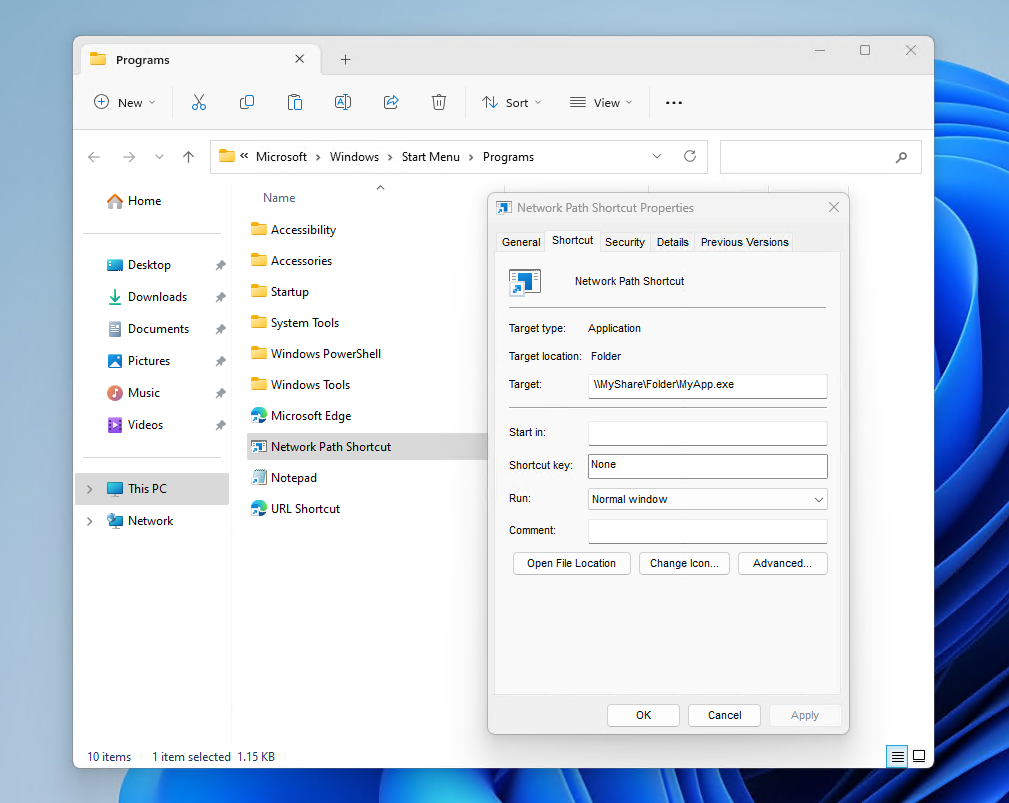
You can now install this MSI and get your shortcut pointing to a network share.
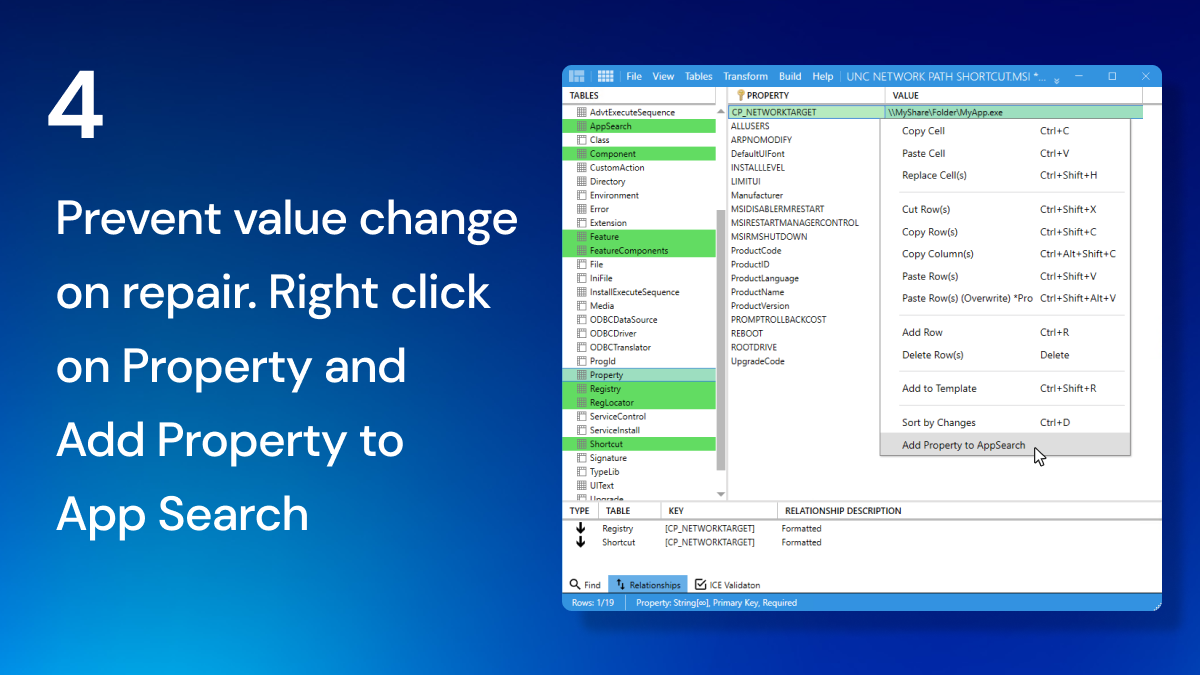
4. However, we recommend adding one more thing - App Search.
Public properties allow IT administrators to use the command line to change their values, which is useful when the network path or target file name changes or varies among different departments.
Without App Search, there can be issues when doing MSI repairs, where the public property value reverts to the original value stored in the MSI.
Luckily, using the Master Packager, adding App Search to properties can be done with just one click by right-clicking on the property and selecting "Add Property to AppSearch.
End result:
2. Create a URL shortcut to a website using the INI file table
There are two ways to accomplish this task.
The first method is to use the MSI shortcut table. We recommend using this solution only if you want end-users to open the website using a specific internet browser, such as Microsoft Edge.
The second option is preferred, as it will use the user’s default browser
This is the way.
1. First, create a new shortcut to your desired website in Windows OS

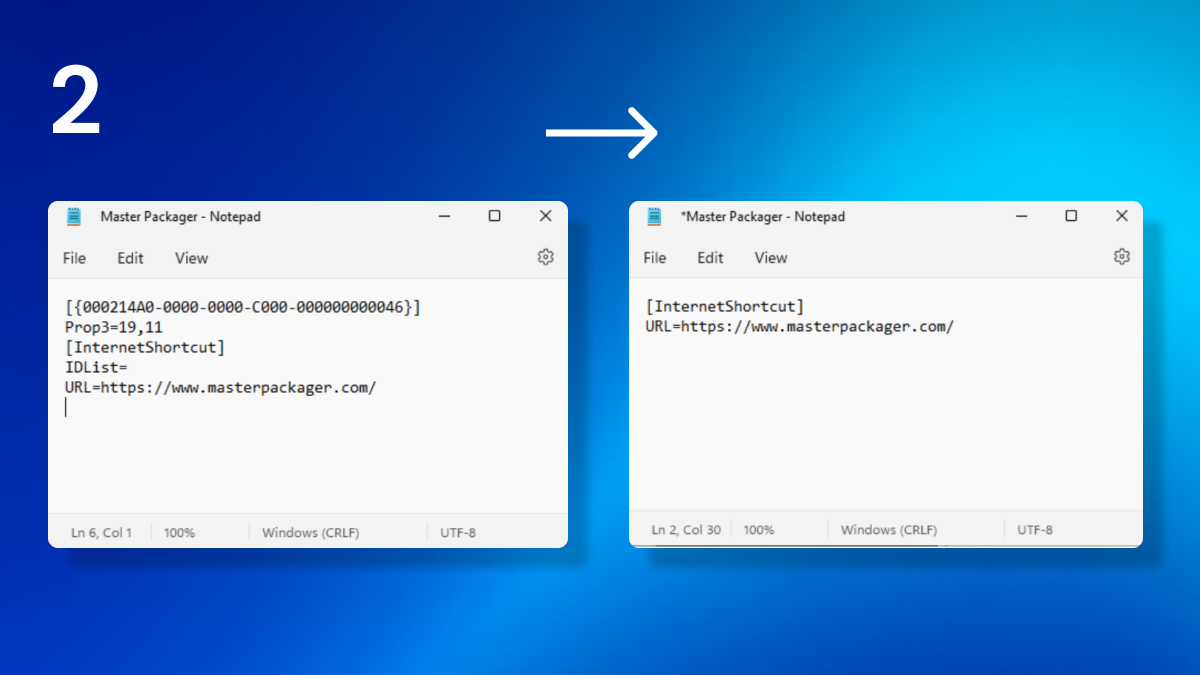
2. Then open notepad and drag and drop your created shortcut in the notepad window.
The only part of parts are:
[InternetShortcut]
URL=https://www.masterpackager.com/
It should look like this:
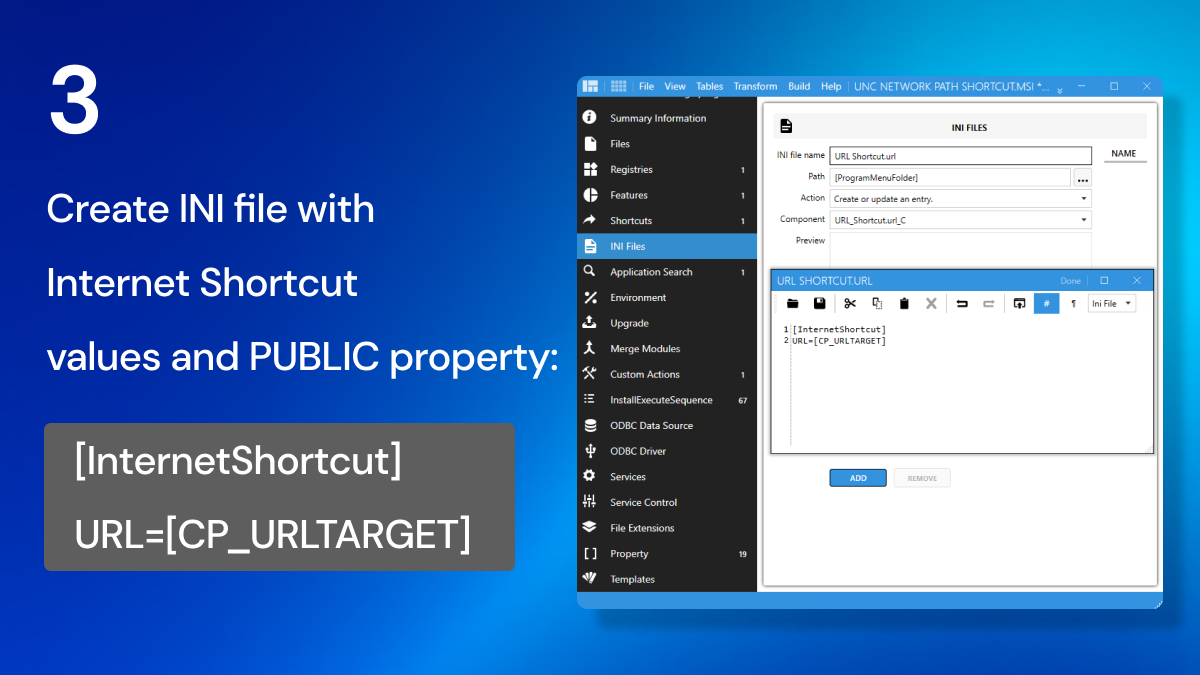
3. Next, create a new MSI and go to the INI files section.
Create a new INI file with a file name that ends with a .url extension.
Set the path where the shortcut should be installed.
And lastly add the INI file content.
To create the highest standard MSI package replace the URL value “https://www.masterpackager.com” with custom public property.
This will allow changing the value during MSI installation.
4. Go to the properties table and add CP_URLTARGET=https://www.masterpackager.com/ property.
5. Right-click on the CP_URLTARGET property and click Add Property to AppSearch.
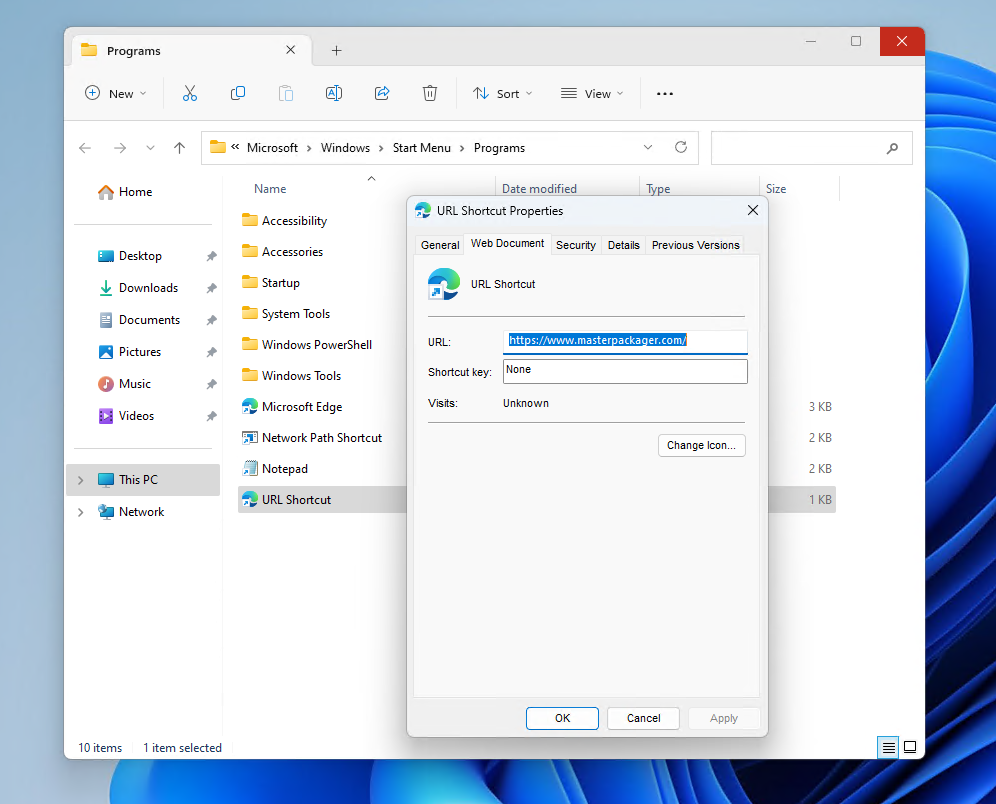
And the end result. Beautiful.
You may wonder why creating shortcuts using an MSI when a PowerShell script can also accomplish this task.
There are two main advantages to using an MSI over a script.
-
First, if the shortcut is accidentally deleted, it can be restored by repairing the MSI.
-
Second, it will appear in the Add/Remove Programs for software inventory agents, allowing you to track which PCs have the shortcut installed easily.
Good luck and let us know if you have any questions. :)