Install MSIX Package
💎 Master Packager Pro feature
This is a custom-created predefined action by the Master Packager team that installs an MSIX package to all users. It allows you to deploy modern Windows applications together with traditional MSI packages.
It’s important to ensure your MSIX package is properly signed with a trusted certificate. Unsigned or improperly signed packages may be blocked by Windows security policies.
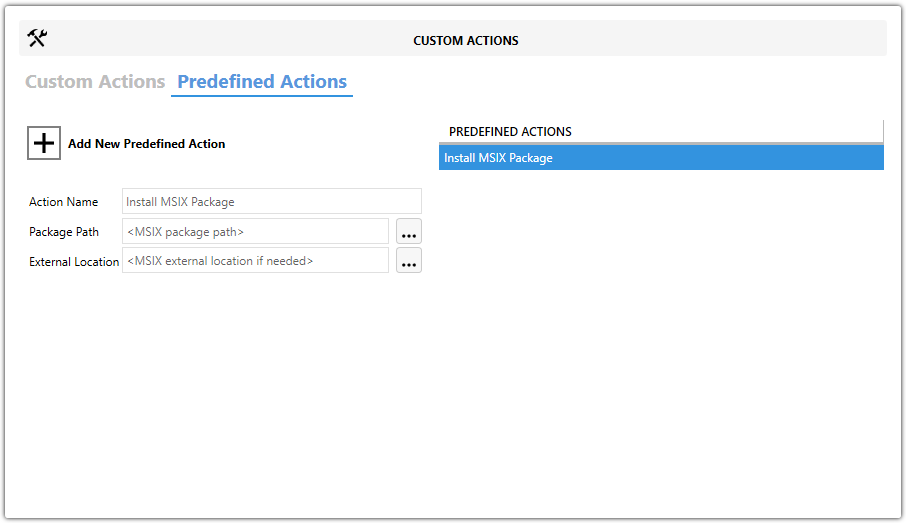
Action Name
Describes what the action will do. Helps identify this predefined action if you have multiple custom actions in your project.
Package Path
Specifies the local file path to the .msix package that you want to install. Click the three dots to browse and select the file.
External Location
Optional. Allows specifying a network or internet location if your MSIX package is stored externally rather than bundled in the MSI.
How to use it?
-
Open MSI/MST with Master Packager
-
Click on Custom Actions in the left menu
-
Click on the Predefined Actions tab
-
Click Add New Predefined Action and choose Install MSIX Package
-
Enter a descriptive Action Name
-
Browse to set the Package Path pointing to your MSIX file
-
(Optional) Enter an External Location if your package is stored outside the MSI
💡 You can uninstall MSIX packages during uninstall using the predefined action Remove MSIX Package, which will remove the package from all users.