Master Repackager
💎 Master Packager Pro feature
Master Repackager is a tool designed to capture system changes and convert them into a ready-to-deploy MSI or MSIX package. It is most commonly used when:
- An existing installer (such as
.exeor other formats) needs to be converted to an.msifile. - Manual system changes (such as file placement, registry modifications, driver installations, or configuration changes) need to be packaged into an MSI for enterprise deployment.
- You need to validate your current installer for MSIX compatibility.
To achieve the most accurate results, always perform repackaging on a clean virtual machine. This ensures that only the changes made by the target application are captured and included in the installer.
When to Use Master Repackager
Master Repackager is ideal for scenarios where traditional packaging tools cannot directly convert software into an MSI/MSIX. Use it when:
- Converting installers – You have an
.exeinstaller but need an.msifor enterprise deployment tools like SCCM, Intune, or GPO. - Capturing manual changes – Manual configurations, registry modifications, driver installations, or other system changes need to be replicated on multiple machines.
- Standardizing legacy software – Older applications without MSI/MSIX installers need to be packaged for modern deployment pipelines.
- Customizing vendor software – A vendor-provided MSI or EXE requires additional changes (e.g., pre-configured settings or bundled files) that you want to include in a single deployable package.
- Modernizing for MSIX – Before migrating to MSIX, validate the current package’s compatibility to identify potential issues early.
Snapshots
The snapshot process is at the core of how Master Repackager works. It involves taking two snapshots of the system (before and after changes) and then comparing them to identify what has been modified.
First Snapshot
The first snapshot captures the initial state of the system before any changes are made.
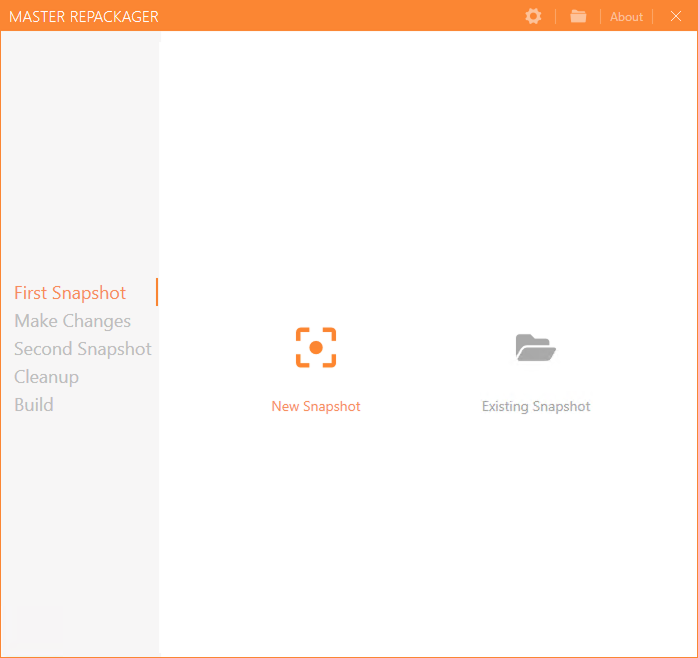
- Open Master Repackager.
- Select New Snapshot.
- The tool will start capturing the current state of the system.
- Once complete, a confirmation message will appear indicating the snapshot was successful.
This snapshot serves as the baseline for the upcoming comparison.
Make System Changes
After the first snapshot is complete, perform all the actions that should be included in the final MSI/MSIX package. These actions could include:
- Installing an application.
- Placing files or folders into specific directories.
- Modifying system or user registry settings.
- Configuring drivers, services, or policies.
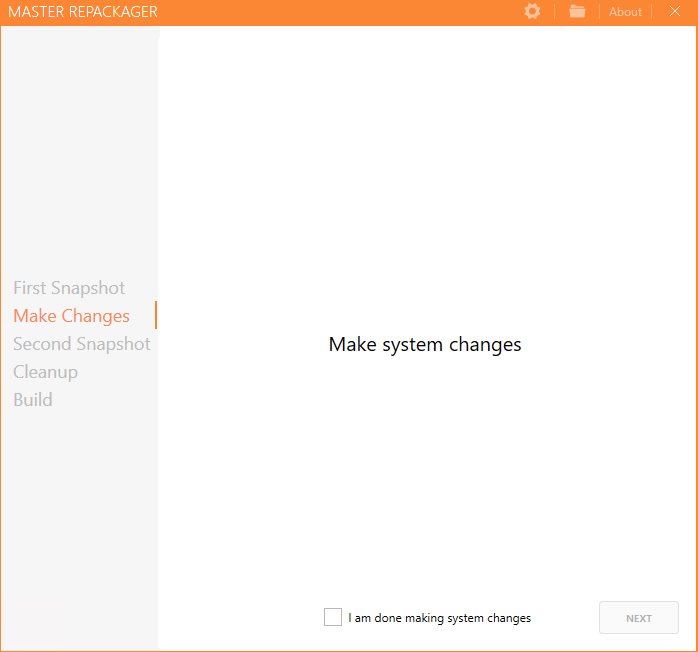
Once all desired changes are made:
- Return to Master Repackager.
- Select I am done making system changes and click Next.
Second Snapshot
Now that the system has been modified, the second snapshot will capture its new state.
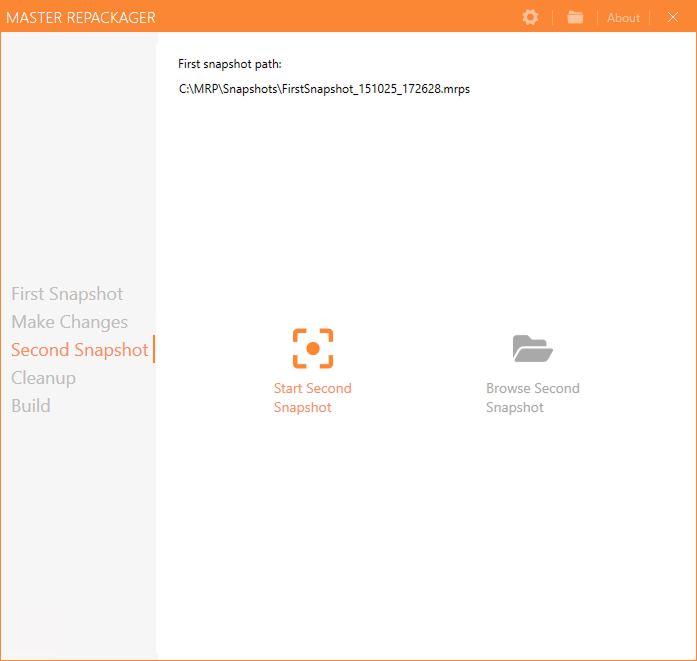
- Click Start Second Snapshot to begin scanning.
- Master Repackager will compare this snapshot against the first one to detect all new, changed, or removed files and registry entries.
After the scan, the captured data will form the basis of the MSI/MSIX content.
Cleanup
After both snapshots are completed and changes are captured, Master Repackager provides tools to review and refine what will be included in the installer.
This step ensures the final installer only contains the necessary changes and is clean and optimized for deployment.
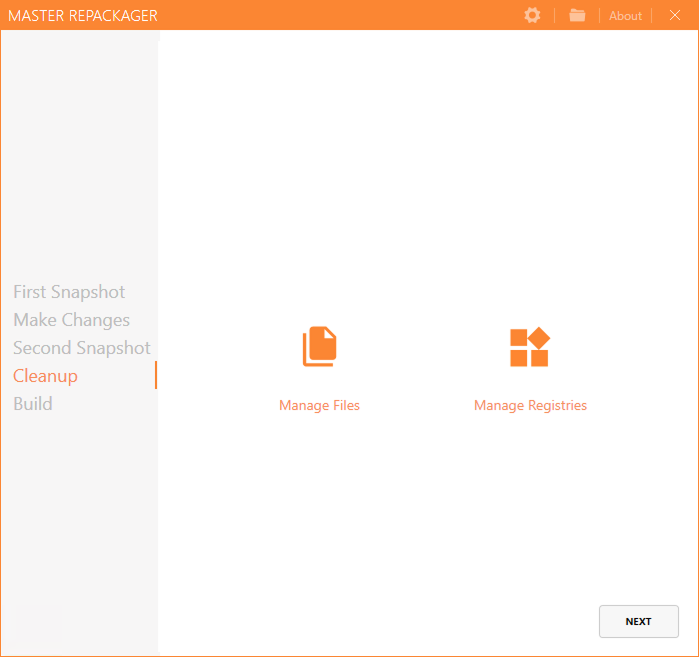
Files
The Files section displays all file system changes detected between the first and second snapshots. Here, you can:
- Inspect Captured Files – View all new, modified, or removed files and folders that were part of the installation or manual changes.
- Include or Exclude Items – Uncheck files or folders that are unrelated to the application (for example, temporary files, log files, or system-generated data).
- Reorganize File Structure – Adjust how files are grouped or placed inside the final MSI directory structure if needed.
- Check File Paths – Ensure all captured files are installed in the correct locations relative to the application’s functionality.
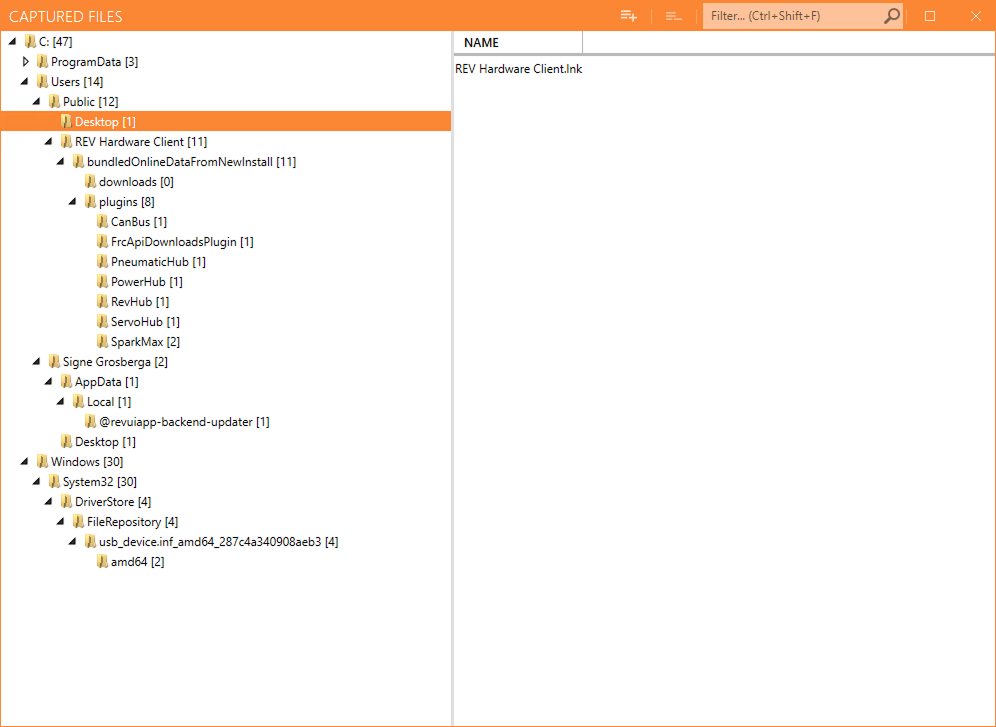
Cleaning up the files section ensures that the package remains lightweight, well-structured, and free of unintended content.
2. Registries
The Registries section shows all registry changes made during the repackaging process. This often includes application settings, licensing data, shell extensions, or service configuration entries. In this section, you can:
- Review Captured Keys and Values – Inspect all newly created or modified registry entries.
- Exclude Irrelevant Entries – Deselect unnecessary keys such as installer caches, recently used file lists, or OS telemetry data.
- Import Additional Keys – If needed, add extra registry keys that were not captured but are required for the final package.
- Open in Registry Editor – Quickly navigate and verify captured keys directly in the system Registry Editor for validation.
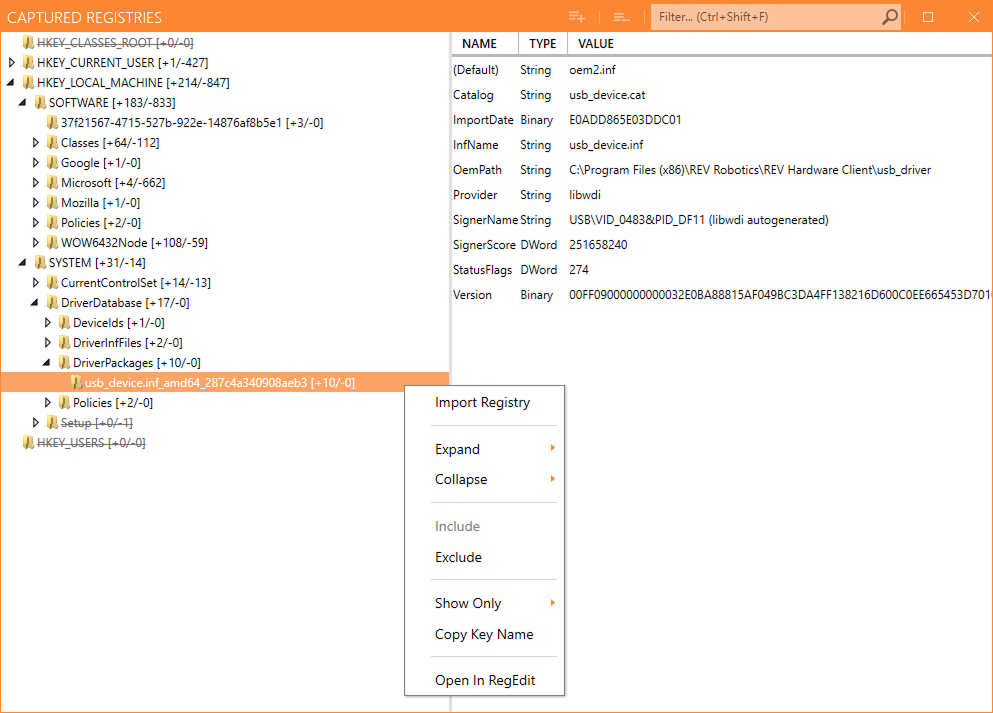
Proper registry cleanup ensures that the final installer contains only essential application configuration data, improving reliability and preventing conflicts with other software.
Build
Once the captured changes are reviewed and finalized, it’s time to create the MSI/MSIX package.
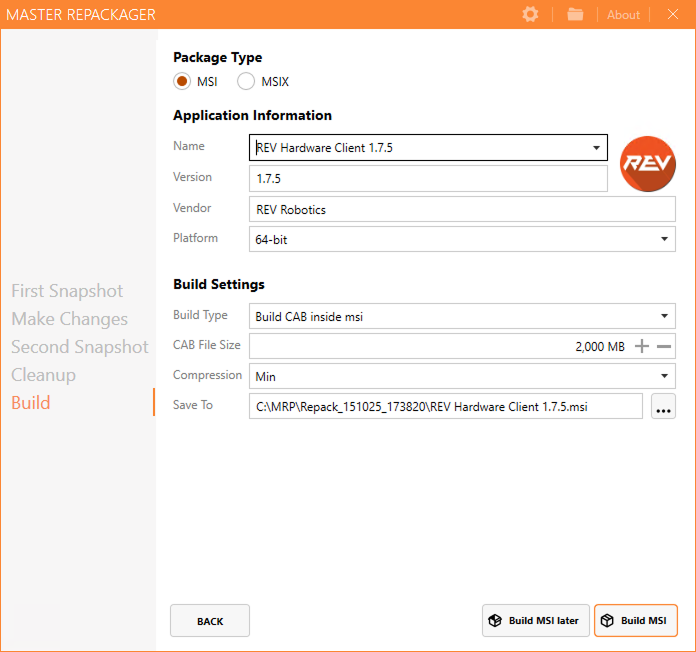
Application Information
- Package Type – Choose between
MSIandMSIX. - Name – Define the application name.
- Version – Set the version number.
- Vendor – Specify the software vendor.
- Platform – Choose the platform (32-bit or 64-bit).
Build Settings
- Build Type – Select how the CAB files will be included.
- CAB File Size – Set the size limit for CAB archives.
- Compression – Choose the compression level.
- Save To – Define the output location for the built MSI.
Once all fields are set, click Build MSI to generate the final installer.
Alternatively, you can choose Build MSI later to save your project and compile it at another time.
When building an MSIX installer, before finalizing, you also have the option to validate the installer for MSIX compatibility. This check helps ensure that your application can be successfully built into an MSIX file without issues.